Where would you like to go?

Friday, 16 March 2012

Excited!!

Wow, remember the iPod touch cake I shared with you all here?  Well, I uploaded it on Cake Central, which is the largest online cake community in the world, on Tuesday afternoon, and when I visited the site the following morning I was surprised to see my cake featured on the front page as one of the most favourite cakes for the day!  It was ranked at top 2 with 95 favourites!  How cool is that?

I couldn't take a screen shot on my computer (the button wasn't working, or I was doing something wrong)...anyway, I really really wanted to share this with you so I took a snap with my camera, lol.  So, excuse the pics (if some look a bit hazy).


This isn't the first time my cakes have made it to the 'favourites', but this one just got me more excited for some reason, lol.  It is an incredible feeling to know that people from all over the world appreciate the effort you put into your creations :-)  And being able to inspire others is truly a blessing!  Thank you to all the Cake Central followers that added my cake to their favourites.  You're all so awesome!!

I'm currently working on two cakes (so I haven't slept yet...).  Will definitely share them with you next week!!  Can't wait to get these done so I can finally see the insides of my eyes!!  hahaha.

Happy Friday everyone!!  See you all next week!!

xo

Thursday, 15 March 2012

Bubble fun with my boys!!

 Carlyle trying to catch the bubbles!  Now this photo taking bubble making process was quite challenging.  I had the bubbles in one hand, and my camera in the other.  I would blow until the room was filled with plenty of bubbles, then quickly grab my camera and try and capture the 'moment' lol.  Not too bad, but there were a lot of blurry photos.  I just had to choose the best ones, haha.

 Javier gets tickled by the bubbles.  So he pretty much laughed the entire time.  He also tried to eat the bubbles, which I didn't get to capture on camera but was super fun to watch.

Carlyle now on the couch (getting ready for his siesta) but still managing to squeeze in some bubble fun.

Javier was sooo happy, he didn't realise he was wetting himself with his water bottle!  hehe

What are you guys doing in this beautiful hot summer's day?

xo

Wednesday, 14 March 2012

PASIFIKA 2012

On Saturday, not only did we attend two birthdays, but we also went to Pasifika!  We really wanted to just walk around as a family and immerse ourselves in the different island cultures, and of course, there's no denying it, the food!  It was Javier and Carlyle's first time, too, so it was pretty exciting for them.

Here are some pics of our family day at Western Springs Pasifika.  Enjoy!!

We stopped at Tonga Village, being an *honorary Tongan myself, I simply had to!  hehe

Then a very sleepy Carlyle was trying his best to stay awake!!

While Javier was loving every minute of it!!

Mmm...ice cream inside a pineapple!!  I just couldn't resist!!

My Samoan boys xo  Carlyle couldn't fight it anymore...zzz

Lotsa people!

Bought me a li'l cute pair of flower earrings to replace an old pair

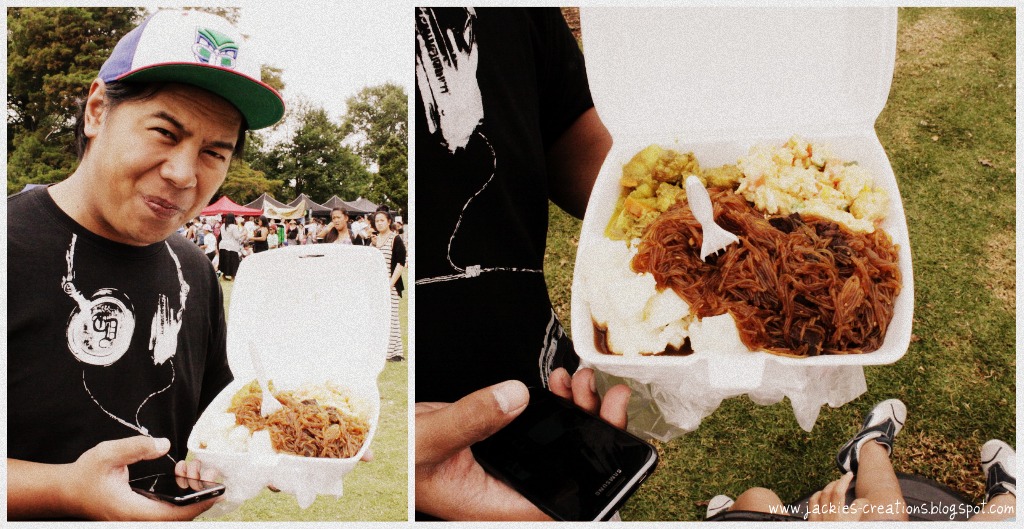
Hubby with his island food!

Our monkey boy Javaughn had a blast!

For my Fijian family!
Toffee/candy apple on a stick

Hope you enjoyed this day as much as we did!  Next year, I'll be sure to stay longer so I can spend time watching the performances!

Have a great day!!

xo

*My friends back in high school used to refer to me as the honorary Tongan because I danced for the Tongan group for three years for the ASB Secondary Schools Polynesian Festival.  :-)

Tuesday, 13 March 2012

Happy 18th birthday Xanda!!

On the weekend I had the pleasure of making a cake for my hubby's niece Xanda.  Originally she wanted a camera cake, but changed her mind and decided to go for an iPod touch cake.  I was really excited at the challenge because, although I had done a similar (iPad) one here, this would be my first of this sort.  My main priority was to make it as clean and as close to an iPod touch as much as possible.  I contemplated on using fondant for the details of the icons because it really gives it that polished look, however I really love the challenge of hand-painting each and every one of them.  It took forever as I had to wait for coats to dry and the fact that there were so many different details that required that extra bit of attention, which of course meant 'time'.

After a couple of sleepless nights (only because I could only work on them in the night) I ended up with something pretty amazing, if I may say so myself :-)  I really love this one, and so proud at the way it turned out.  I did want to add a silver lustre dust on the grey exterior of the cake, but ran out of time.  It still looked awesome without it, so it wasn't a big deal for me.

So, here it is!  Hope you enjoy it as much as I did!

Hand-painted details
The following icons were done minutes before we left for the party.  I wanted to personalise the cake with a birthday message, but didn't want to just pipe on it.  So I came up with the following four icons: a smiley face (happy), birthday cake (birthday), Xanda (her name), 18 (her age).

And now for some sexy angles...

Click 'read more' to see the birthday girl and some other highlights from her 18th!

Monday, 12 March 2012

Nappy Cake!!

Good Monday everyone!!  How was your weekend?  Hope you had a wonderful time!  Today I am thrilled to share with you a cake that I haven't done in a while...a NAPPY CAKE!!  Or as some of you may refer to it as Diaper cake, depending on where you come from :-)

My Mum asked me to make her one for a colleague's baby shower.  I was so excited because lately I've only been making edible cakes, so it was a nice change to be working with different materials.  Before 'real' cakes became a more serious passion for me, I was always making nappy cakes for family and friends.  The great thing about making this type of cake is you are not limited to using only edible materials.

So, without further ado, here is a girly nappy cake!  Enjoy!!
Nappy cake
Ready to leave my place...
Lovely details...

Hope you liked today's post!  Come back tomorrow for my very first awesome iPod touch cake I made on the weekend for my hubby's niece's 18th birthday!

xo

Thursday, 8 March 2012

DIY storage box

I know, I know, I haven't posted too many DIY stuff for y'all lately.  It doesn't mean I haven't been doing any.  I just haven't been diligent at sharing them here.  I still have 'stuff' I did last year that I haven't shared yet...now I can't find the photos!  lol.  So I thought it was about time I shared something with you that's purely DIY (and non-cake related for a change).

I actually made this baby yesterday, when I was trying to find a (cheap...meaning FREE) storage solution for my junk stuff.  It didn't involve much, just a nappy box, adhesive spray, some wrapping paper, and scissors.  It's super easy and so worth-it!!  I promise!!

Now, pictures can definitely say more than a thousand words, so here they are!!

 You can use whatever box you want!  I happened to have an empty nappy box lying around.  First you need to cut off the top flaps of the box.

You need to select two different designs of wrapping paper for both exterior and interior.  Cut them to size so you are all ready to stick!

Beginning with the exterior, take your box outside and lightly mist over (using your adhesive spray) the side you're working on.  Apply your chosen wrapping paper, then repeat this process until you complete covering all the sides (including the bottom).

Use the same application process for the interior.

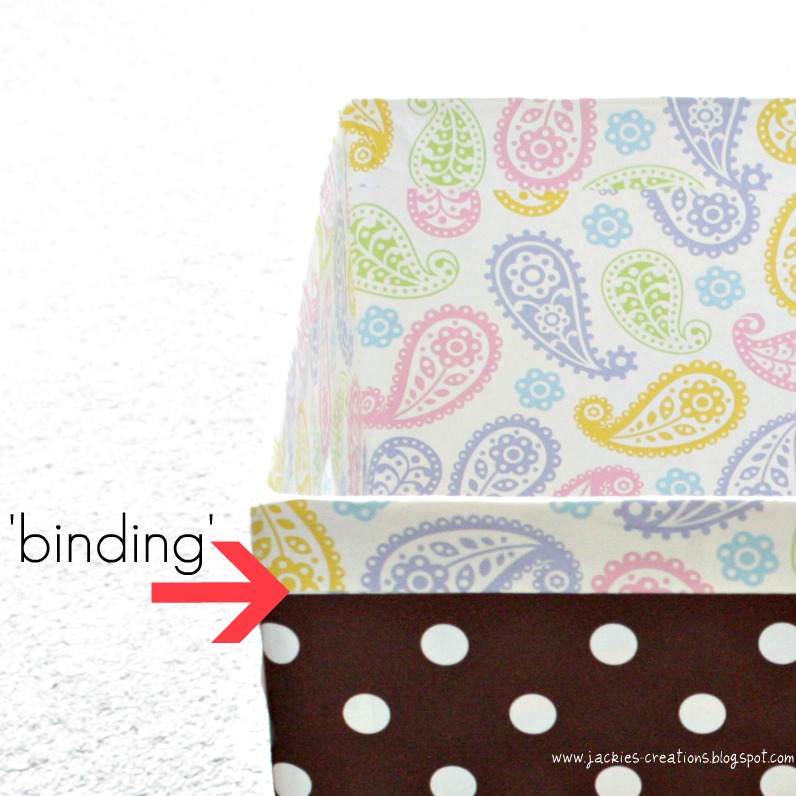
Now, cut extra strips (using the interior wrapping paper) to create a 'binding'.  Adhere to the top of the box (so this piece should be adhered to the interior then folded over to the exterior of the box) to achieve a seamless look (see picture below).

Then you should end up with something like this!

And now here's a very deserving BEFORE & AFTER pic for you guys...

With this DIY project, feel free to switch the wrapping paper to fabric (which is what I originally intended to do but didn't want to spend a cent).

My advice for this project is to not be afraid to use what you already have.  Sometimes colours and designs that you wouldn't normally put together can actually complement each other.  I mean, I mixed paisley and polka dots!  And soft pastel colours with brown!  Take a risk!   You'd be amazingly surprised!

Have a wonderful Thursday!!

xo

Note: I made a second box, exactly the same, but this time I started with the interior.  I don't really have any preference to be honest, so start wherever you like!  I can't wait to try a fabric version!  Time to rummage through my Mum's wonderful fabric collection I think, hehe :-)

Monday, 5 March 2012

Cars birthday cake for Keanu!!

On the weekend I had the pleasure of creating a cake for a boy named Keanu.  His Mum contacted me a little while back asking if I could make him a Disney Pixar Cars themed cake for his 4th birthday.  I was really excited to come up with something awesome for him.  After some brainstorming I decided to go for a track cake, similar to the one I made for my nephew Malachi here, but Cars inspired.  I really love the Radiator Springs setting, so I made sure I incorporated that on the cake.

Lightning McQueen is made of fondant and all the details are hand-painted.  The white kept turning pink because of the red fondant, and it was really driving me insane!!  But, I still think he turned out pretty cool!  All the other details are made of fondant, too.  Here it is, hope you like it!!

 Just realised that this first picture didn't have the 'Keanu 4' road sign attached yet...oops :-P


Hope you liked today's cake feature!  Have a wonderful day and enjoy this gorgeous sun we're blessed with!!!

xo